
Character Design and Modeling Process – Dorshínzia
Originally created for my Character Design and Modeling class in spring 2022, Dorshínzia is a character from my personal project who I'd been meaning to give some love for a while. The owner of the largest trading company in the country, she holds her head up high in the face of adversity and is wildly stubborn.
This project marked the first time I ever modeled, textured, and rigged a character from start to finish!

To begin the ideation process for this character, I sketched some silhouettes for her to see what
did or didn’t work. I already had a little bit of material to work with since I first designed her pretty
early on in college (that design left a lot to be desired), but it was still tricky figuring out the exact
silhouette I wanted to give her. I would argue that her cactus hair was the most important part of
her silhouette from the beginning until the end.

Next, I created some basic thumbnails for how I wanted her to look. At this point, I was more
focused on getting the right feel across for her. I knew I wanted her to be elegant and flowery, so
it was a matter of figuring out how to incorporate those two factors.

Next up were some more detailed sketches. Again, I settled on the cactus hair very early on so
it wound up staying in the design from beginning til the end. I considered giving her a hat
because of how much elegance can be put across when you give characters hats, but figured
she was better off without one. More importantly, I came to a conclusion in terms of what I
wanted the rest of her to look like! I realized that I could get across the idea of a hoop skirt by
using the same kind of lattice that you see used for growing plants. After that, it was really only
a matter of figuring out her shirt.


Next, it was time to start modeling.
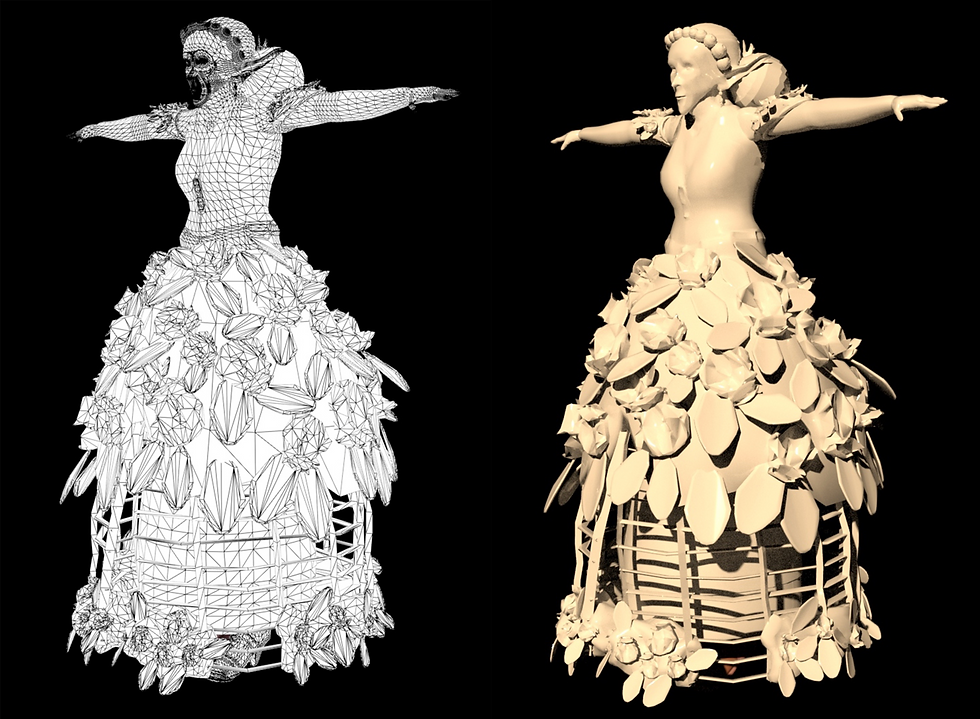
Figuring out how to make her low poly was a nightmare in and of itself because of her foliage.
Because of this, I actually went through a few sculpts of her foliage before settling
on this one. What I ended up doing to make my life a lot easier was getting her roses and
leaves as low poly as possible, unwrapping them, and texturing them separately. It saved a lot
of time and hassle! The rest of her was pretty easy to make low poly. I didn’t realize how few
polygons you can use to get a shape across effectively, so this part of the project was super
fascinating to me! If I were to go back and change things, I would definitely make her face and
sandals lower poly (my professor wasn’t super clear on how few polygons were needed to make
a face that can emote, so I went a little overboard).

Her high poly sculpt was a joy to create. I really loved putting in all her wrinkles and stuff like
that! Her foliage wound up being created almost entirely in Maya, so there isn’t a high poly
version for that. In terms of rigging, this was actually my first time trying my hand at it! I definitely
learned a lot, particularly when it comes to when to parent (or not parent) objects to joints or
each other. My favorite things to rig were definitely everything involved in her head. It was really
important to me to make it so that she could emote with her ears because I thought it’d be cute.
I also made it so that her skirts have physics but unfortunately, that never made the cut in the
turntable.
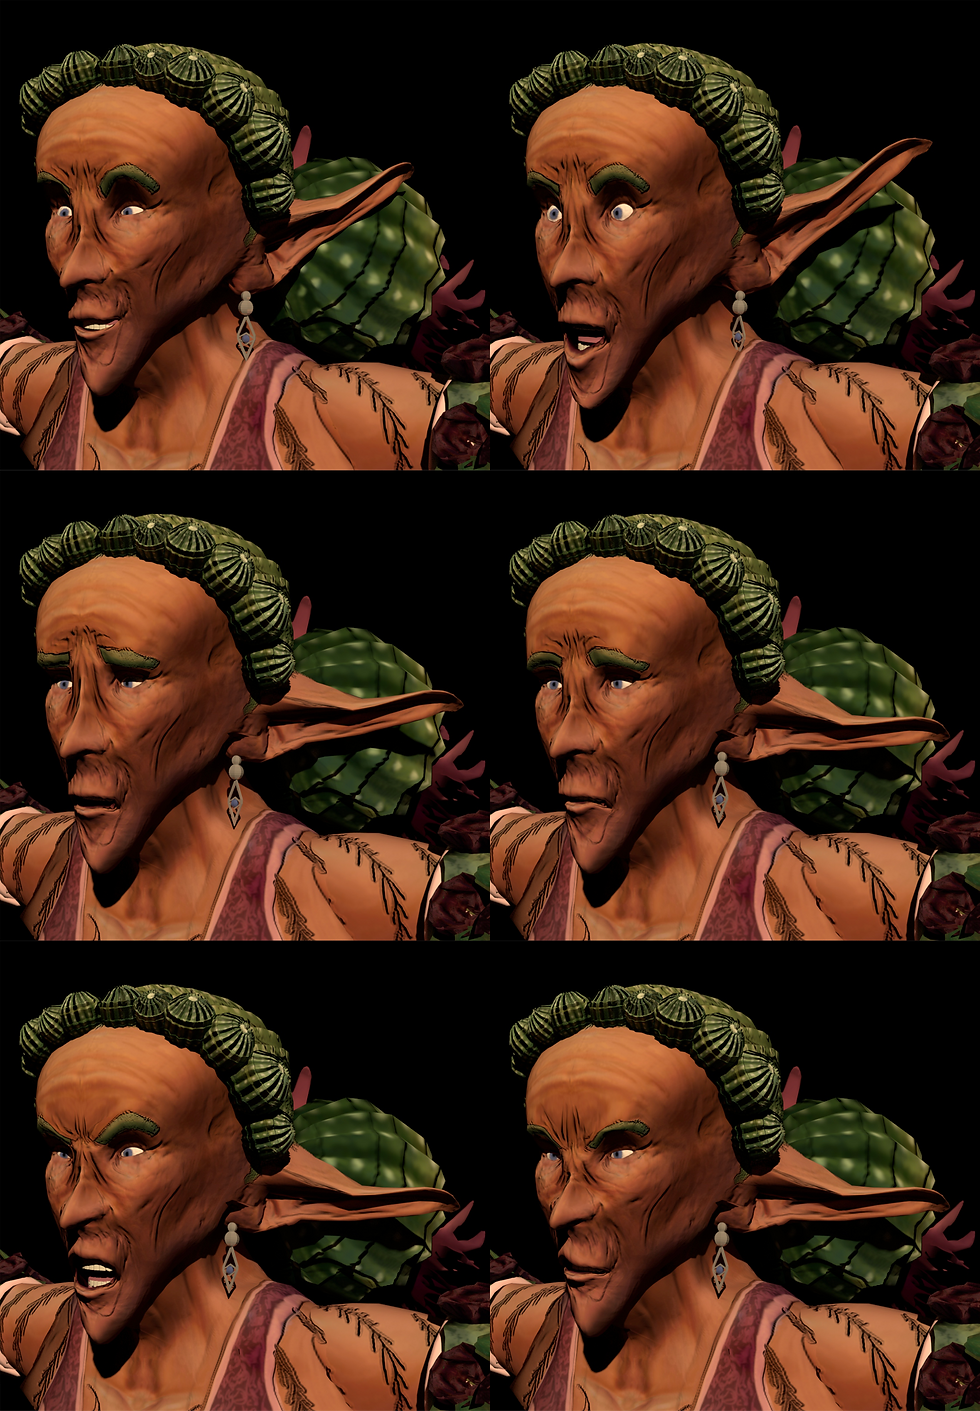
Much like other things in this project, this was my first time working extensively with
Blendshapes. In the future, I think it would be cool to get her or another one of my characters to
have phonetic Blendshapes.


These are my final renders on the project. I had (possibly too much) fun playing around with the dramatic lighting here. Overall, I’m really pleased with the results, especially for my first time going down the entire modeling pipeline.


Comments